
Using the Wiki on AtikTeam
The wiki system is a powerfull tool for creating and connecting your content and knowledge. Its operation is based on two simple principles:
- a simple wiki syntax designed to make editing fast and rendering consistent
- pages are not sorted in folders, but in a relational manner. In other words, navigation on a wiki is not done by exploring a main menu, but browsing the content directly from links to links, from page to page. Thus, it is beneficial to make links to other resources of the wiki whenever relevant, in order to facilitate navigation.
Navigation on the wiki
Navigation in wiki pages is very simple, just follow the links.
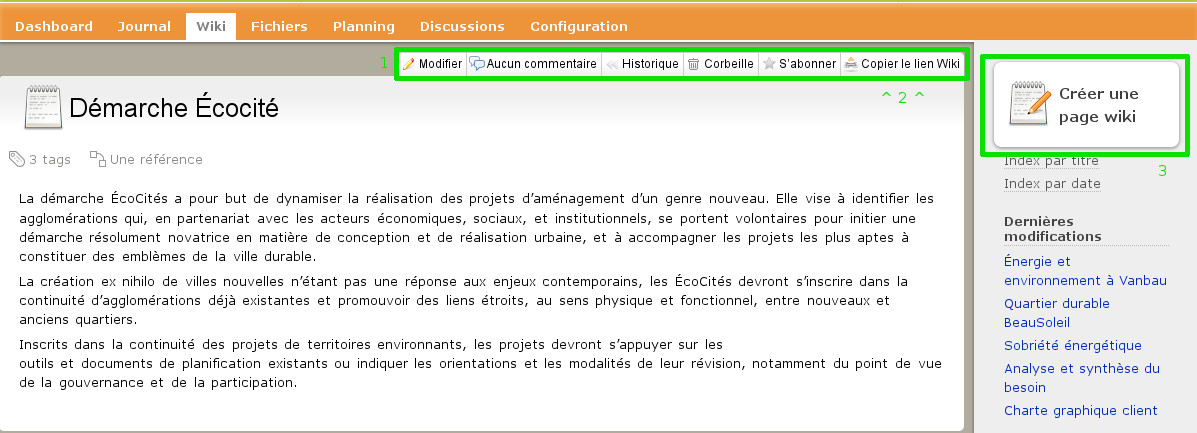
The following must be noticed:
- [zone 1]: toolbar for editing a wiki page
- [zone 2]: copy the wiki link, in order to reserve it in a clipboard, and paste it into another page. This method allows to link pages to others.
- [zone 3]: create a new wiki page
Wiki syntax on AtikTeam
The syntax used is close to the Textile format, an optimized format for easy and fast authoring. In most text boxes of the interface, you can use this syntax to define the different elements of your text.
Above the text box, there is a toolbar to insert the Wiki syntax automatically. You can also consult the “quick help” accessible by the link Wiki syntax help at the top right of the text box.

The wiki bar has the general layout:
- bold (B), italic (I), underlined (U), crossed out (S)
- highlight (ab)
- title level 1 (H1), title level 2 (H2), title level 3 (H3)
- Unordered bullet list, number list
- mathematical formulas (Σ), preformatted text (pre)
- images (img), tables (tab), wiki links (links)
The wiki syntax is designed to be very fast to use while remaining simple to learn. New users can read the memory aid and use the buttons on the bar tool to insert the markup, and then once used to the syntax, they can type it directly on the keyboard while authoring content.
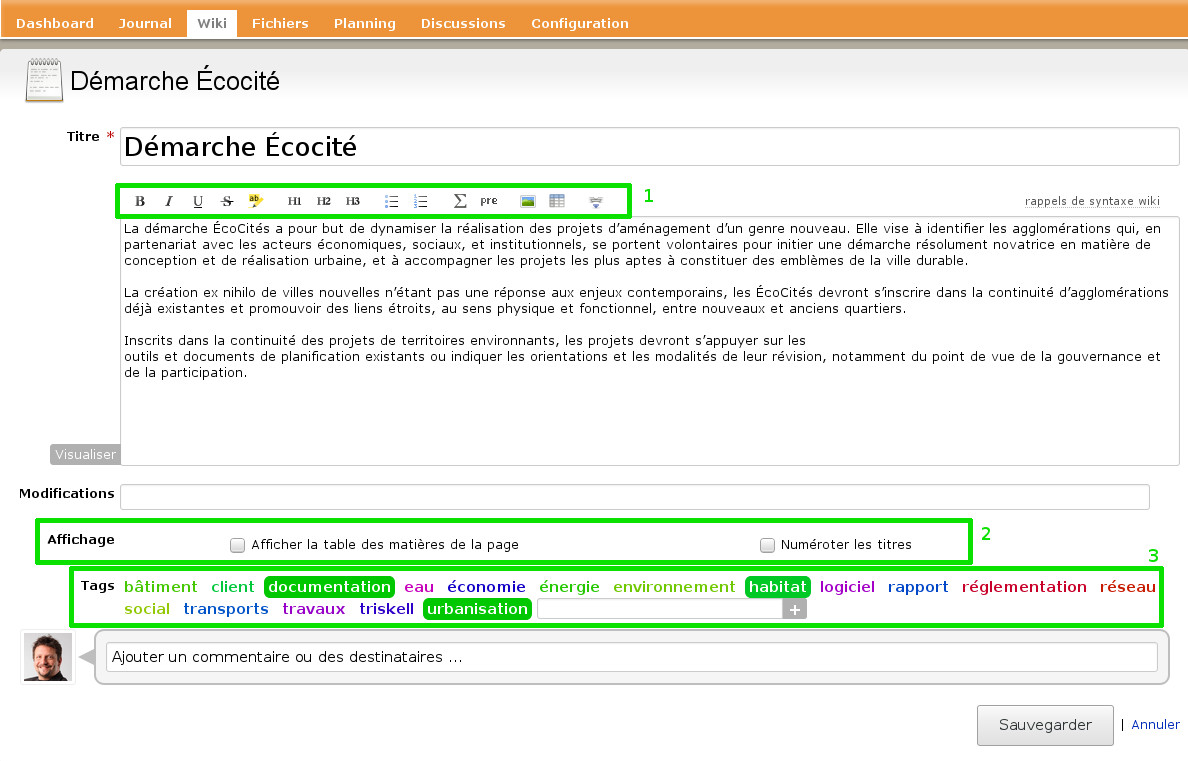
Important areas of the edition are:
- [zone 1]: content markup toolbar
- [zone 2]: layout settings
- [zone 3]: tags to classify the page (optional but always recommended to optimize the accessibility of your information)
You can have a preview of its rendering by clicking on the link View. Using this feature is usefull to avoid excessively high number of savings due to minor syntax corrections.
Do not forget to save the wiki page when you’re done.
How to create a new wiki page?
You can create a new wiki page by clicking on the button provided for this effect, from the wiki. After creating the page, remember to copy the page wiki link and paste it into other pages. By referencing your page, you will make it easily accessible and maintain a consistent wiki link network.
Use links to link resources
For a Wiki to be effective, you need to link resources between them as soon as possible.
Automatic links
A resource that can be linked in a wiki page offers a link “Copy Wiki link”(see above, zone 2) where you can click at any time.
Then you can insert this link into your document by clicking on the button “Paste wiki link”, in the toolbar.
When writing a long Wiki document in which you want to insert a lot of links, it is a good practice to use 2 browser tabs: one to browse resources and copy the Wiki links, and the other to write the document and paste the copied links.
Link label
When you create a new link, the text that will be displayed will be automatically extracted from the targeted resource. This will be for example the subject of the action, the title of the wiki page or the name of the file. This is called link label.
Let’s take the case of a wiki page with title “Specification”. You copy the wiki link, and paste it into another document. You will have in the source something like {{wiki_page#6}}, while rendering on the page will display a “Specification” link.
You can choose the label yourself, as to better integrate the link in its environment. For this, separate the link text with “||”. For example, if you write:
{{wiki_page#6 || the specifications of the mission}}then the link will be rendered as “the specifications of the mission”.
Note that the separator character “|” is accessible on PC keyboards by simultaneous pressing of AltGr and the key 6. On Apple keyboards, press Shift, Alt, and L.
Images
The wiki toolbar allows inserting images from your computer or from an image database of the project. You can have a link on the image with the link property, for example:
{{image#34 || size=original || link=https: //www.atikteam.com}}Find a page
As explained above, the usual way to go to a wiki page is to follow links, and reach the resource desired. You can also use “Index by title” links and “Index by date” in the right column to display these lists. Finally, you can search by keyword with the search engine.