



File sharing
File sharing is a space designed to easily upload files, along with a description and information to quickly find your documents. These can be documents from external sources as well as documents produced by your team. The version history of these documents is kept to make monitoring easier, and a mechanism ensures that only one person at a time modifies a file.
You access the shared files through the Files tab of your project.
View shared files
The organization of the files is based entirely on Tags. Using this principle, you can attach as many keywords as you want to your document without having to build a tedious directory tree. To find documents, you can narrow the list of files to a specific selection of tags using the filter on the right of the page. You can sort the file list according to different criteria by clicking on the headers.
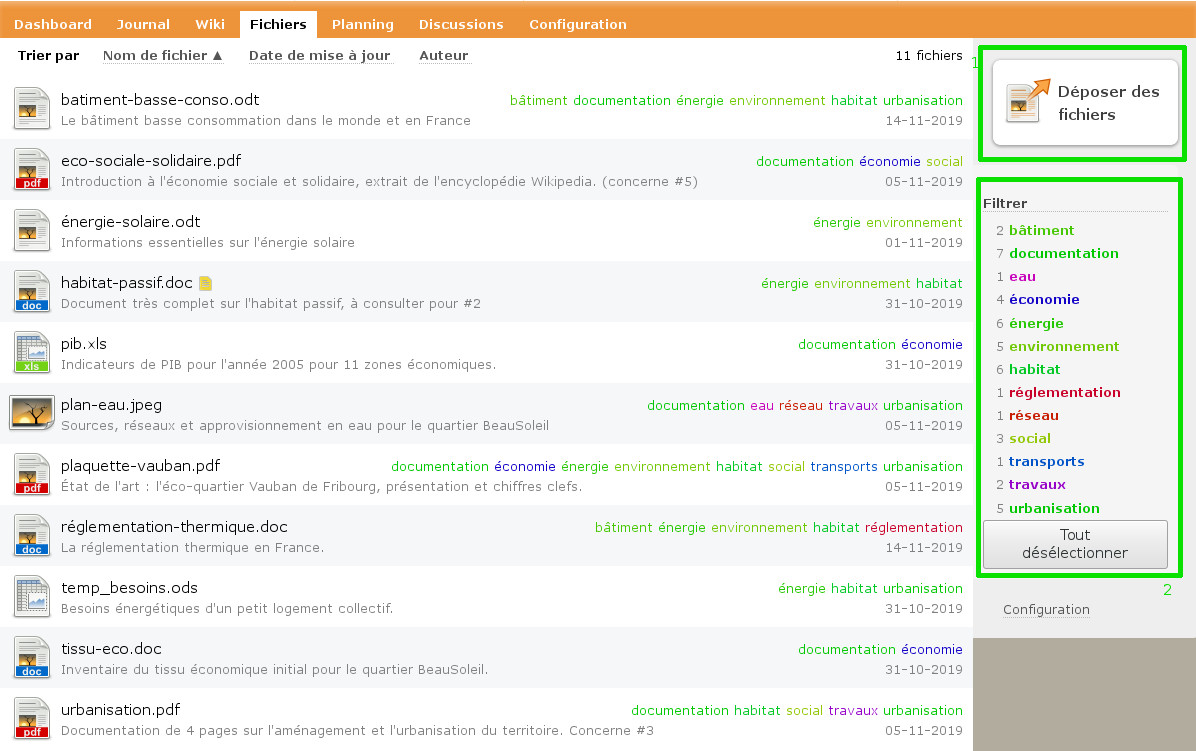
- [zone 1]: add a new file
- [zone 2]: filter the display of files by tags
By clicking on a file name, you open its page where you can read its description, download it, modify it or generate a wiki link to this file.
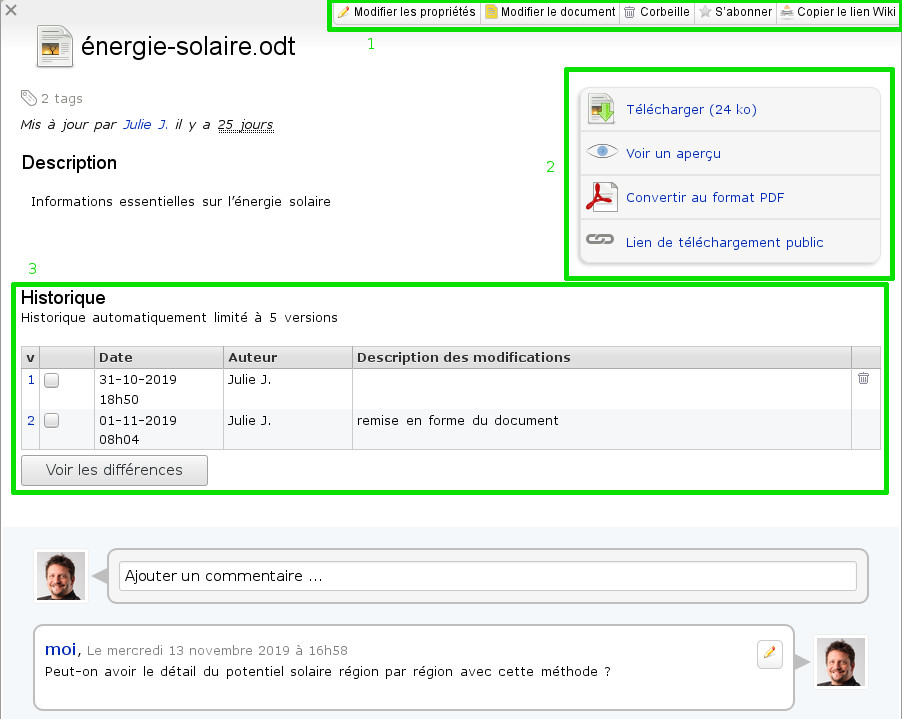
- [zone 1]: file toolbar: modify properties, modify the file itself, trash it, subscribe to events, or copy the wiki link to link this file elsewhere
- [zone 2]: download the file, view it online, convert it to PDF, or get a secure download link to share by email.
- [zone 3]: see previous versions of this file
Add a file
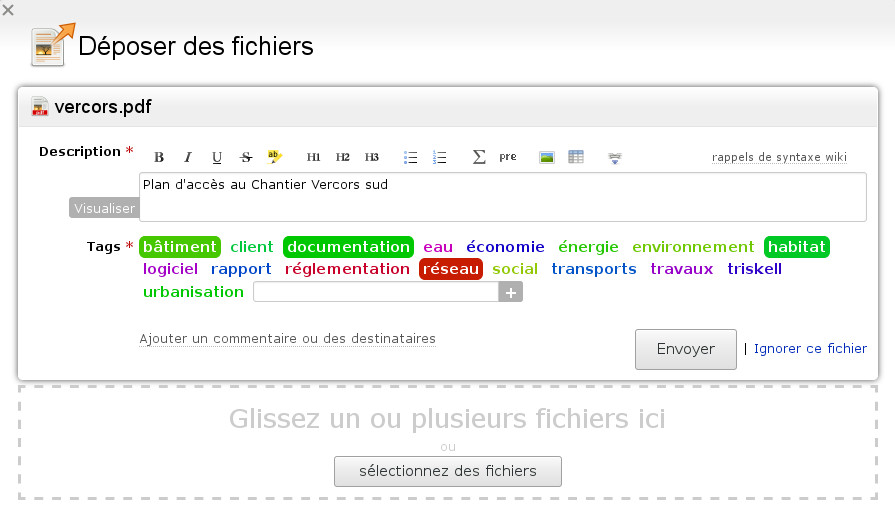
From the list of files in the shared space, use the "Add files" button, then select a file on your computer, enter a description and a set of tags. Tags are essential because they are the classification system of the shared files repository: you must use them. Refer to the tags documentation for more information.
Previous versions of the file are kept, which provides better security and makes it easy to follow changes. In order to avoid using too much space, you can let the application automatically delete the oldest versions of a file, and keep only a limited number of the most recent ones.
You can change the number of versions kept for a file after uploading it. To do this, open the file page and click on "edit properties". Then, in the "History" section, specify this limit, which must be a positive number. To disable automatic deletion of old versions, choose '0': this will keep all versions.
Edit a file
You can easily edit a shared file. If you want to make sure that no coworker makes changes at the same time as you, you can get exclusive editing rights for a period of time to make your changes. To begin, click on the "modify the document" button. Enter a short description of the changes you intend to make, and optionally an indicative release date. Remember to make your changes based on the most up-to-date version of the file, so that you do not unintentionally overwrite the work of one of your collaborators. You can then edit the file on your computer with your usual tools. When you are done, go to the page of the document to upload your updated file, along with a short description of the changes made, to help your coworkers understand them.
If you change your mind, you can abandon the current procedure by clicking on the button provided for this purpose. Doing so will allow another collaborator to edit the document.
Share a file outside AtikTeam
You can share a file with people who are not members of your project with the Public link feature. To do this, go to the page of a file, and click on the "Public Download Link" button. You can choose a validity period for the link, then copy it (right click → copy or Control-C). Paste this secure link into an email and send it to your contacts: they will simply click to download the file.
Remove a file
From the file page, simply click on the trash icon to remove a file. A project manager can delete it permanently, or restore it.